


Hosting
Once you purchased a hosting account with GVO, we will provide you with access to freshly setup Web Hosting Manager (WHM for short), so you could create an account and develop your websites.
A hosting package is simply a set of functions, limitations and resources every cPanel account may have within a Reseller Hosting Account.
Basically, having different packages with a different set of functions and limitations allows to provide a range of hosting accounts based on particular features.
NOTE: It is recommended to configure a hosting package prior to creating a new cPanel account in WHM to simplify further cPanel accounts management process.
To create a package follow the instructions:
- Log into WHM by clicking Step 3 option in your GVO account
- Click ‘Log in to Webhost manager’ option
- Navigate to the Add a Package menu in the section
Packages. Just start typing ‘Add a package’ in Search field top-left corner
- Set appropriate quotas in the Resources section
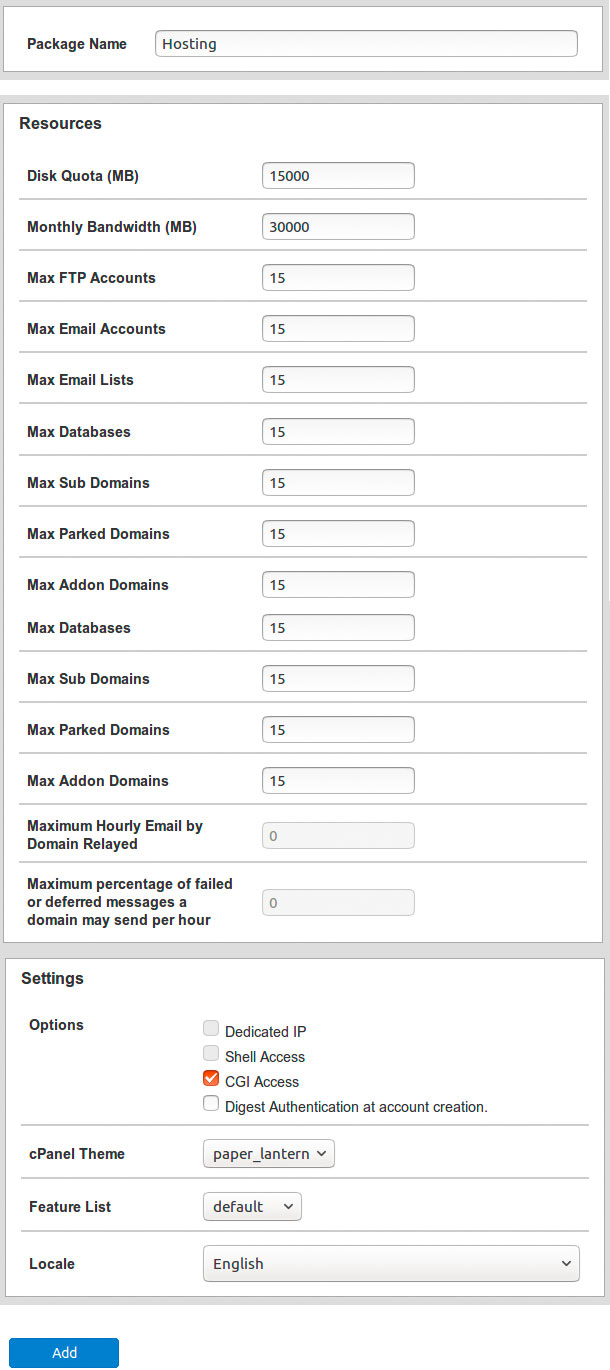
- Click on the Add button.
That is it!
Please check additional cPanel tutorial guides here https://www.cpanel.com/products/cpanelwhm/cpanel11/tutorials.php#
In this tutorial we will take a look at cPanel creation in your WHM.
cPanel is a most popular web-based control panel.It allows using a graphical user interface (GUI) to manage any aspect of your website. With the cPanel, you have complete control of your website without depending on website developers.
With the cPanel, you now can manage the important aspects of file management, FTP, backups, mail system (including spam filter and autoresponder, email account forwarders and mailing lists) domain and sub-domain control, error page management, password protection of web folders, statistical information, users management, Cron Jobs, Leech Protection, HotLink Protection, SSL Manager, Network Tools, and MySQL database administration.
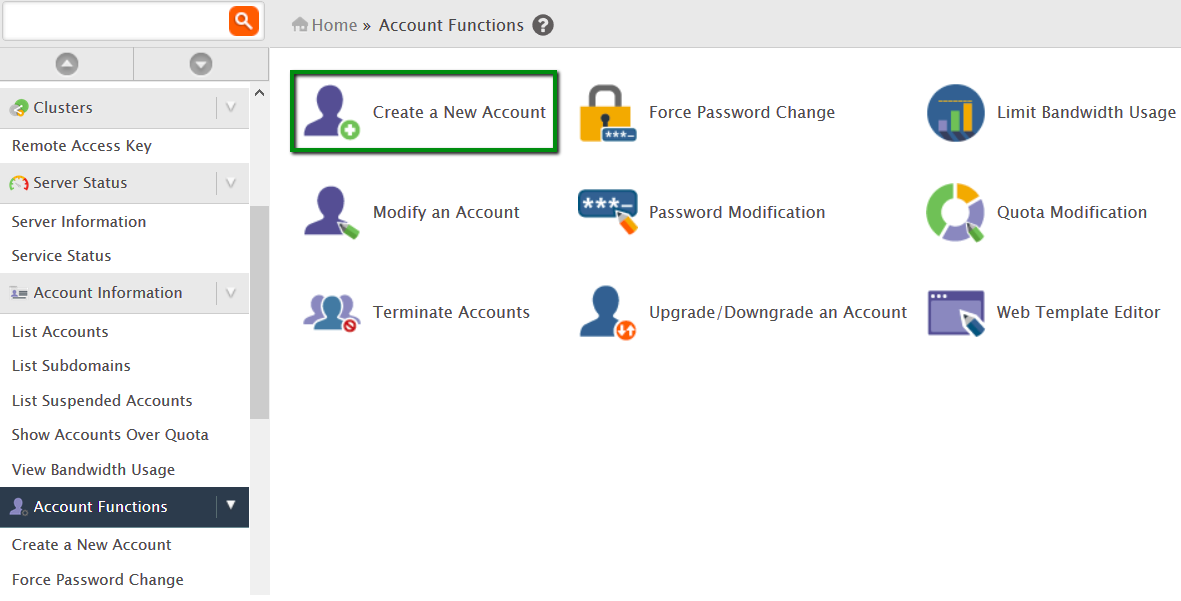
WHM allows easy creation of accounts in Accounts Function -> Create New Account menu.
- create_cpanel_1.2.png
NOTE: Please make sure that you have created a resource package before cPanel account creation, please refer to our guide here How to create a resource package in WHM
During account creation you will need to specify the following features in WHM:
- Domain: choose the main domain you are assigning to the account. It should be plain domain name, without http:// or https://
- Username: enter the username you are assigning to the account or leave the one created by default.
- Password: enter the password you are assigning to the account; pay attention to password strength indicator, it must be at least 70 to proceed. Password is case sensitive.
- Email: here you need to specify contact email address which will receive server-side notification, like when you reset the password for your account. You can leave it blank.
Take a look at screenshot below:
- Click ‘Log in to Webhost manager’ option
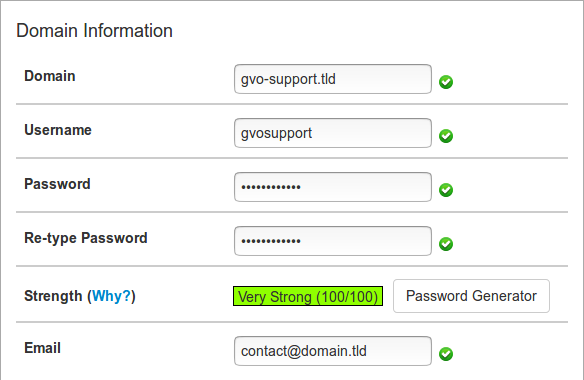
Then you should choose a package from drop-down list:
- package.png
If you do not have any packages configured, please follow our guide here: How to create a resource package in WHM
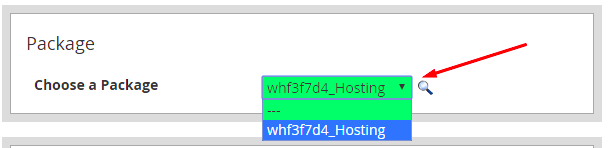
Next area is account Settings:
- settings.png
- CGI Access: by enabling this option you allow CGI scripts for this account
- cPanel theme: select the theme that will be used by your new account. By default only paper_lantern is available.
- Locale: here you can set the language for the new cPanel
Next you should take a look at DNS-settings:
- dns-settings.png
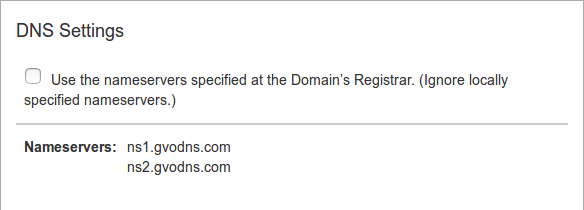
By default check-box should be unchecked.
Last area you should check is Mail routing:
- mail-routing.png
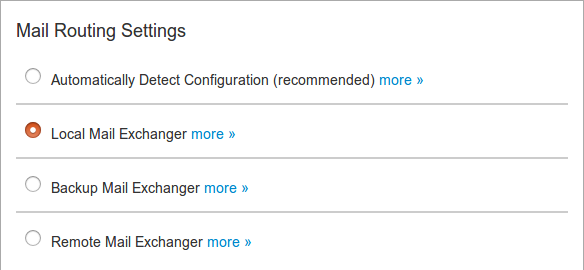
Automatically Detect Configuration: this option will configure mail exchanger depending on the MX records and priority you set for them
Local Mail Exchanger: this option will configure the server to always accept mail locally whenever it is sent from the server or outside the server, select it if you wish to use your cPanel email service. We strongly suggest using this one by default.
Backup Mail Exchanger: this option will configure the server as a backup mail exchanger; mail will be held until a lower number mail exchanger is available
Remote Mail Exchanger: this option will configure the server not to accept mail locally and send mail to the lowest MX record, select it if you wish to use a third-party email service
Once ready, click on Create. If the account creation has been successful, you will see this message:
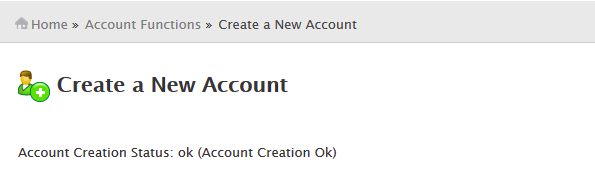
That’s it!
Please check additional cPanel tutorial guides here
https://www.cpanel.com/products/cpanelwhm/cpanel11/tutorials.php
Once you order hosting service, you can start creating your own website. Using Softaculous automatic app installer you can install WordPress in a few clicks.
Below you can find step-by-step guidelines covering the process:
- Log into your cPanel. If you are not sure, please refer to our guide here How to log in to WHM/cPanel.
- Navigate to Softaculous Apps Installer menu:
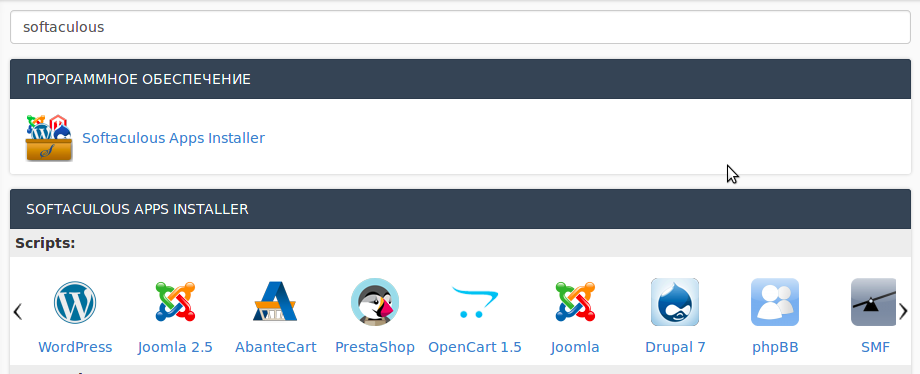
Hint: Start typing ‘Softaculous’ in cPanel search field to find it quicker.
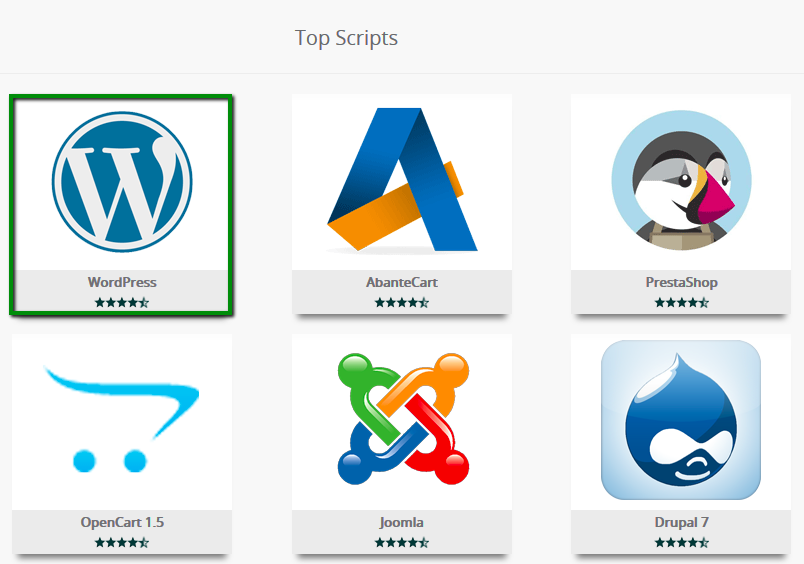
- On the homepage, click on the WordPress icon:
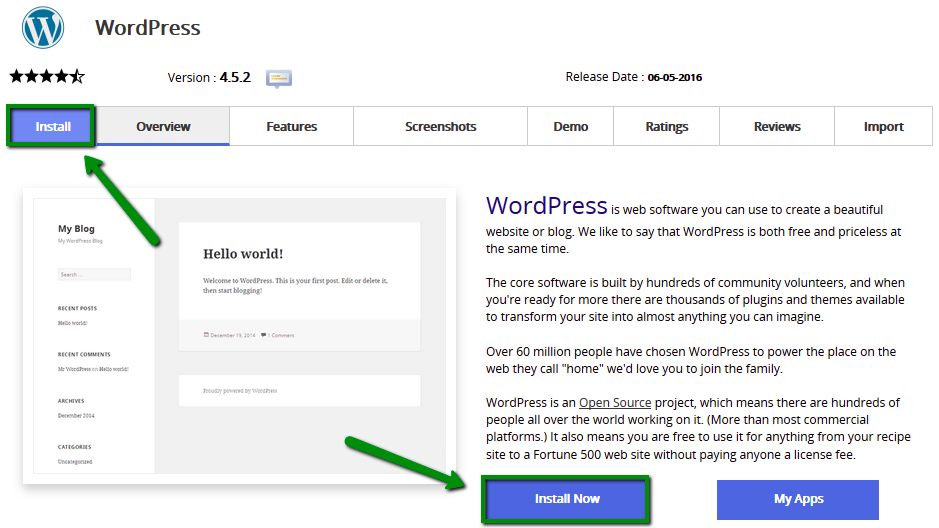
- Click on the Install -> Install now tab to proceed further:
- On the next page you will need to fill out the details of your WordPress installation.
- Choose the domain you wish to install WordPress for
- In the In Directory field you can specify the root folder for WordPress installation. By default, this field is empty, and it allows installing WordPress on yourdomain.com directly. If you wish to install it to a subfolder, like yourdomain.com/blog, simply type "blog" in this field.
- Database Name can be left default.
- Table Prefix can also be left default wp_; however, due to security reasons it is better to change it, e.g., to gvsite_.
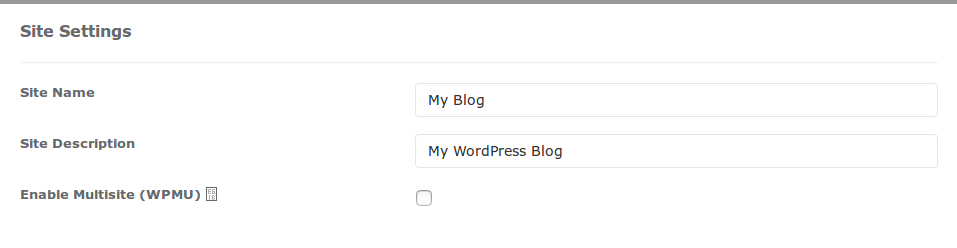
- The Site Settings section should be filled out accordingly to your needs, though you can change it anytime later if required.
- Make sure you set up secure and hard-to guess details in the Admin Account section:
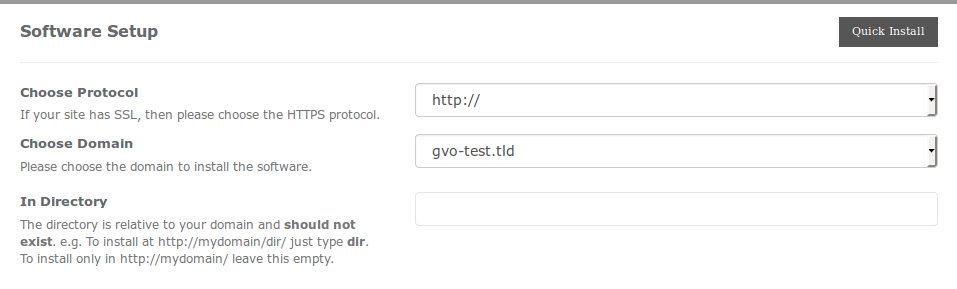
IMPORTANT: Make sure that ‘In Directory’ is blank!
- Once you are ready, scroll down and hit Install.
In a few moments you will see the message that WordPress has been successfully installed:
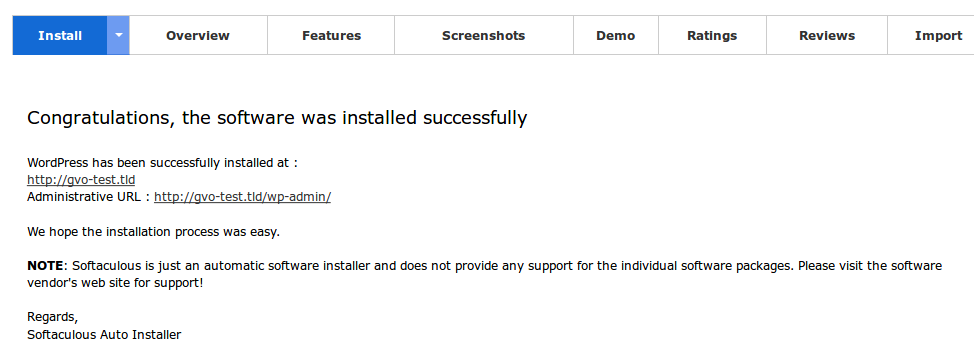
Now you should be able to log in using access details you specified and start developing your website.
Please check additional cPanel tutorial guides here
https://www.cpanel.com/products/cpanelwhm/cpanel11/tutorials.php
There are 2 main ways to upload files to your cPanel.
- Using File manager option;
- Using FTP client like Filezilla.
Let us take a look at File manager option:
- To get to that option you should enter cPanel and then click on File manager
icon.

You will be redirected to File manager screen with list of folders and files. It should look something like this:
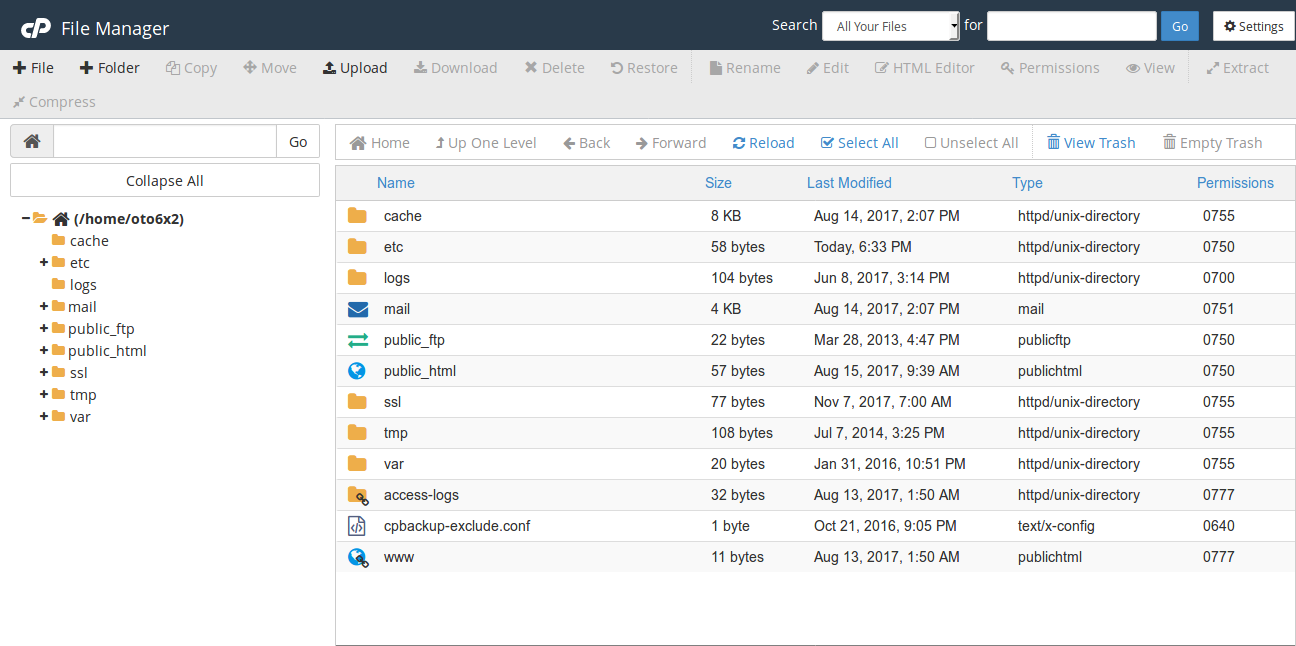
You can click on ‘+’ to check folder structure or double-click folder to see it contents.
- Navigate to proper folder. In our case we will be uploading file to /home/ folder directly.
- Click Upload button

It will open upload menu:
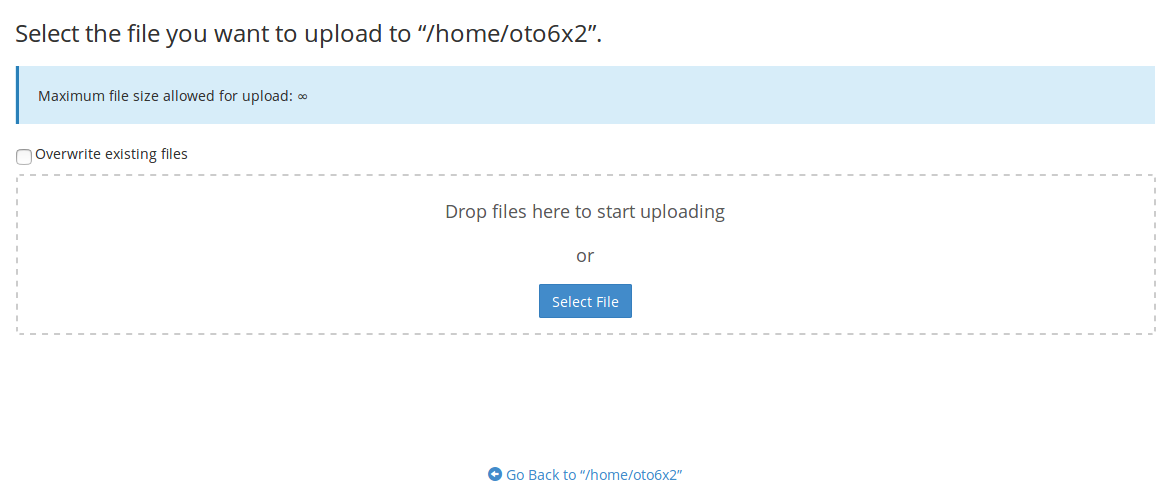
You can drag and drop files to marked area or click ‘Select file’ button, options are the same. Once file upload starts you will be able to see progress bar, it will turns green when upload is complete.
- Click ‘Go back’ to open File manager main screen.
That is it for File manager basics.
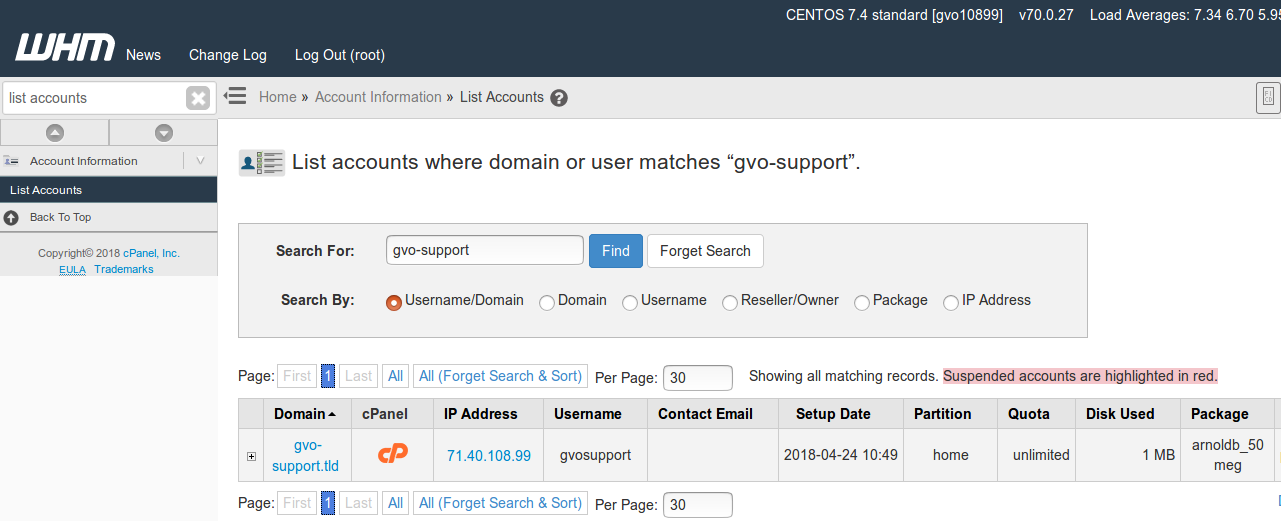
Let now take a look at using FIlezilla FTP-client to upload files:
- Open Filezilla
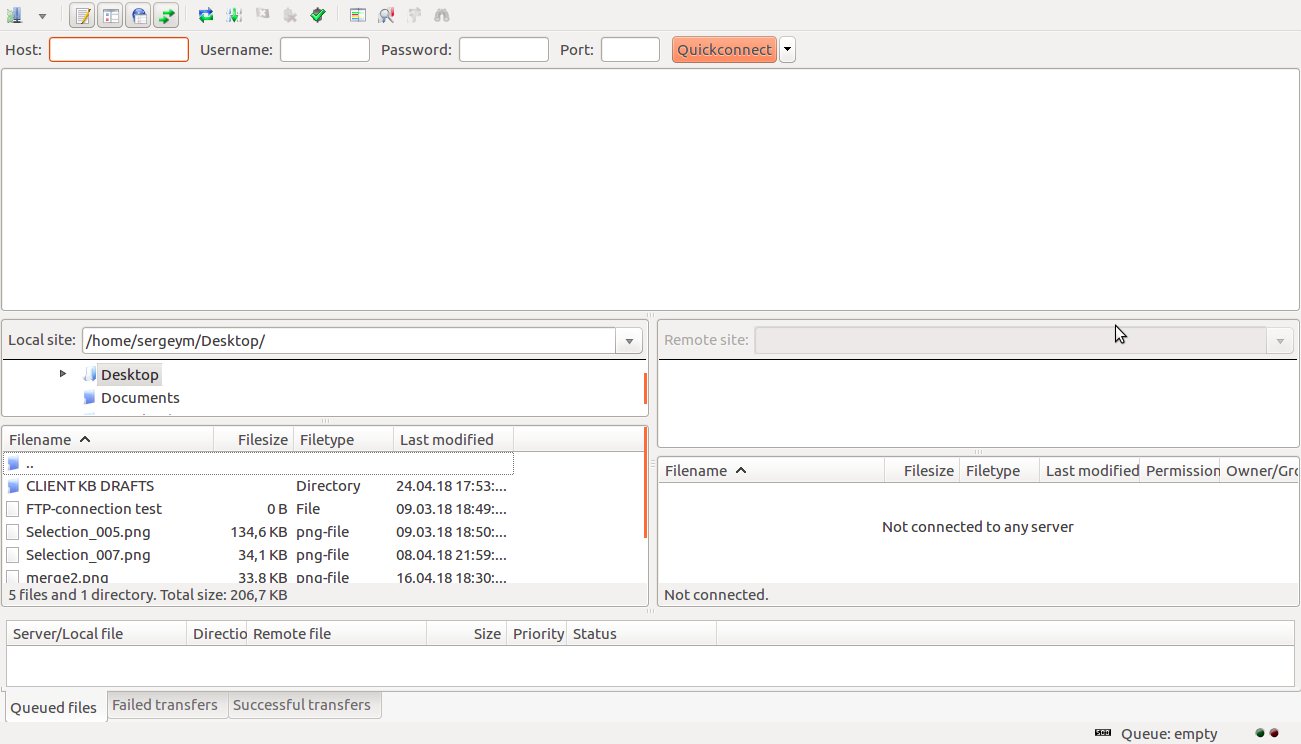
- Specify necessary login details, such as:
Host - domain name or website IP address. In order case it will be gvo-support.tld and 71.40.108.99 respectively.
Username - cPanel username of account you are going to upload files to. For gvo-support it is gvosupport
Password - cPanel password of account
Port - FTP port number, it will be 21 for any account.
- Once connection details specified click ‘Connect’.
NOTE: probably Filezilla will show you ‘Unknown certificate’ warning. It is safe to accept it and click ‘Ok’. Make sure that checkbox ‘Always trust this certificate’ is checked.
- Now you can easily upload files from ‘Local site’ (your local machine) to Remote site (hosting
at GVO) by dragging necessary files. Process pretty straightforward and intuitive.
That’s it!
Please check additional cPanel tutorial guides here
https://www.cpanel.com/products/cpanelwhm/cpanel11/tutorials.php
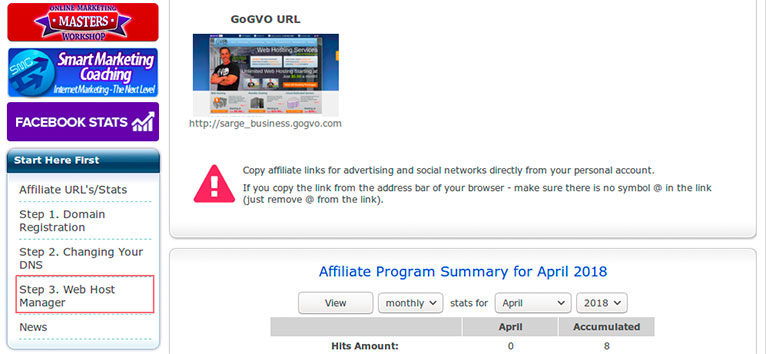
Once you purchase any hosting package, option to Log in to your Webhost manager will be activated.
Here is how to locate that:
- Enter your GVO account here [https://gogvo.com/affiliates/login.php]
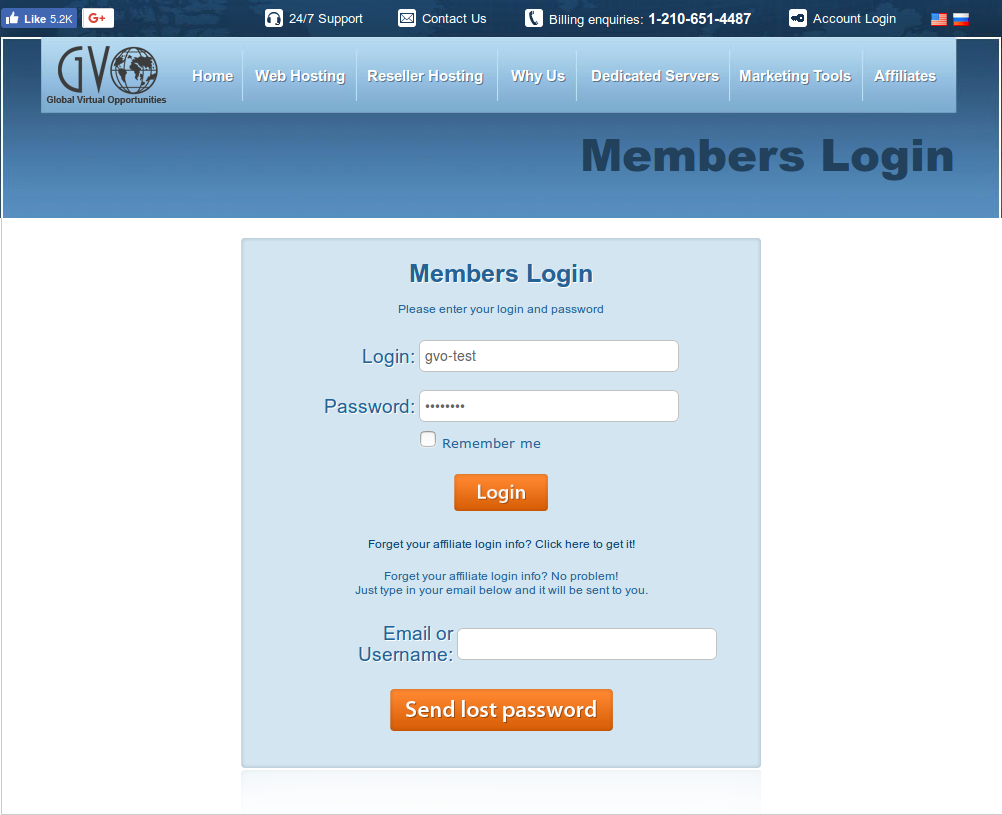
NOTE: If you do not remember access details, please use option ‘Send lost password’
- Once you in GVO account, please take a look at left-side option exclusive to GVO customers
“Start here first”
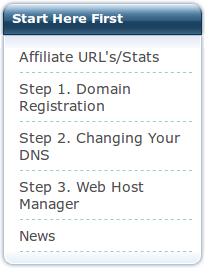
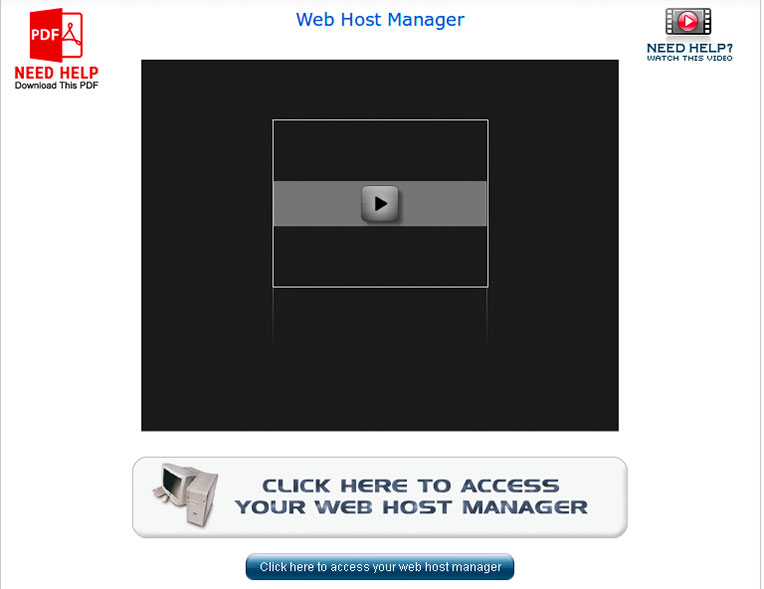
- Click ‘Step 3. Web Host Manager’ option.
- In that option you will be presented with short tutorial video and button labeled “Click here to
access Web Host manager”

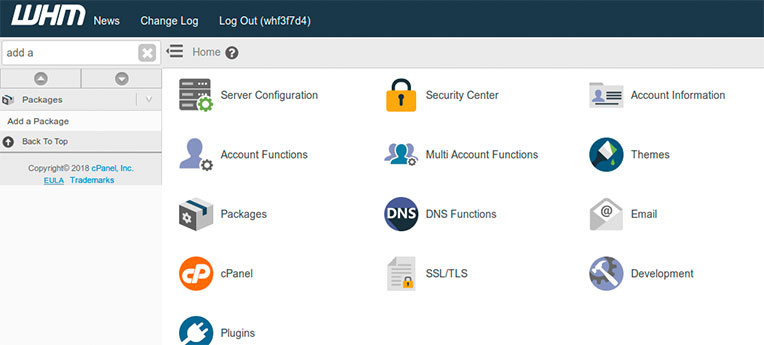
Press that button and you will be redirected to the main WHM interface.
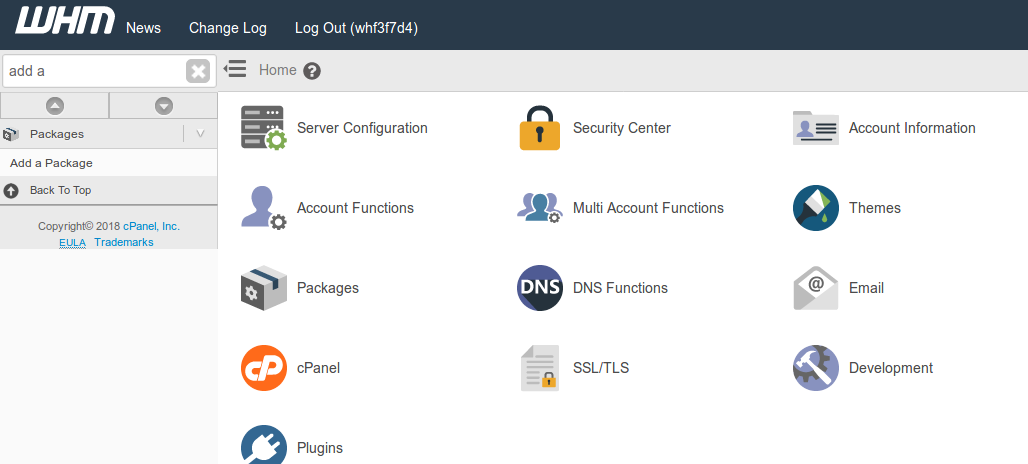
In WHM you can add Resource package, Create cPanel How to create cPanel.
If you already have cPanel accounts created, you can log in to any account in List accounts option under Account information tab.
Just click on orange ‘cP’ icon to enter proper cPanel account.
That is it!
With our Hosting packages we provide access to WHM panel.
However, our clients have restricted rights in WHM comparing to Dedicated Servers WHM (root user rights), so some functions are not available for them.
In WHM, you can:
- create individual cPanel accounts
- create custom hosting packages for cPanel
- manage features of hosting packages and accounts
- reset passwords/contact email addresses for cPanel accounts
- edit Resource Limits for cPanel accounts
- access any cPanel accounts without entering login details
- perform basic system and control panel maintenance
cPanel is designed for managing separate hosting accounts on the server. End users/clients are able to:
- install CMS using Softaculous
- upload and manage files for their websites
- add/remove addon domains and subdomains
- create email accounts and manage email settings and SPAM protection
- edit DNS records for their domains
- check website statistics
- manage databases and backups, etc
Let us take a look at user’s structure of WHM/cPanel.
- Root level access to WHM (also called Server Administrator access) : with that type of access client has FULL and unrestricted access to any possible feature in WHM and associated cPanel accounts. Such access available for our clients that have ordered any Dedicated Server package https://gogvo.com/dedicated-server-hosting.php
- Reseller access : that is a type of access that is directly below Server administrator, and have more limited access options to work with server. Which exact access options are allowed depends on features allowed by Server Administrator/root user.https://gogvo.com/web-hosting.php
- cPanel access : that is most limited server type access. With cPanel access, user is usually allowed to manage only single domain and related services (DNS, email accounts, etc.). cPanel accounts can be easily created by users with Reseller access to server.
That is it!
If you are seeing similar error messages in your browser:
- The connection was reset. The connection to the server was reset while the page was loading.
- The site could be temporarily unavailable or too busy. Try again in a few moments.
- If you are unable to load any pages, check your computer's network connection.
- If your computer or network is protected by a firewall or proxy, make sure that Firefox is permitted to access the Web.
That means that your local computer most likely is unable to reach server due to your local IP-address being blocked on server firewall.
- First of all you should determine IP-address you are using to reach server. You can easily do that by clicking this link http://cpanel.com/showip.cgi
- Copy that IP-address and open chat window with our support team or submit a ticket with subject “My IP-address is appears to be blocked” and include IP-address you get at step 1 and any domain name in your WHM. That will allow us quickly locate your account and check why IP-address was blocked and remove block.
That is it!
You can easily create email account in your cPanel with a few quick steps:
- Log in to your cPanel account. If you are not sure how to do that, please take a look at guide here How to log in to WHM/cPanel
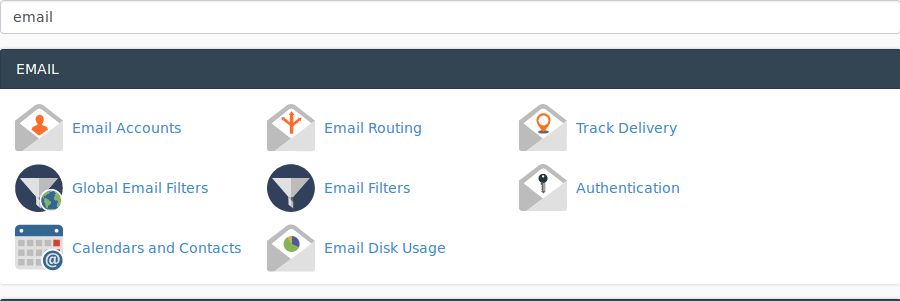
- In cPanel start typing ‘Email accounts’ in search field and click ‘Email accounts’ option
- Fill out necessary fields with desired Mailbox name and Password (make sure that password strength is at least 60). You can set any amount of disk quota for your mailbox.
- Click ‘Create’
It could take up to 1-2 minutes to create mailbox. System will show you green confirmation message once mailbox creation is complete.
That should be all!
Sometimes you need to make a backup before attempting to change something on website, or just to keep fresh copy of it just in case. In this tutorial we will describe how you can easily and efficiently do that.
- Log in to cPanel. If you are not sure where to do that, please check our guide here. How to log in to WHM/cPanel
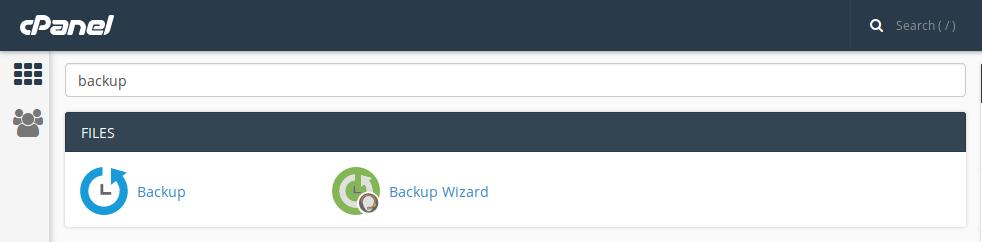
- In cPanel start typing ‘Backup’ or navigate to Files tab.
-
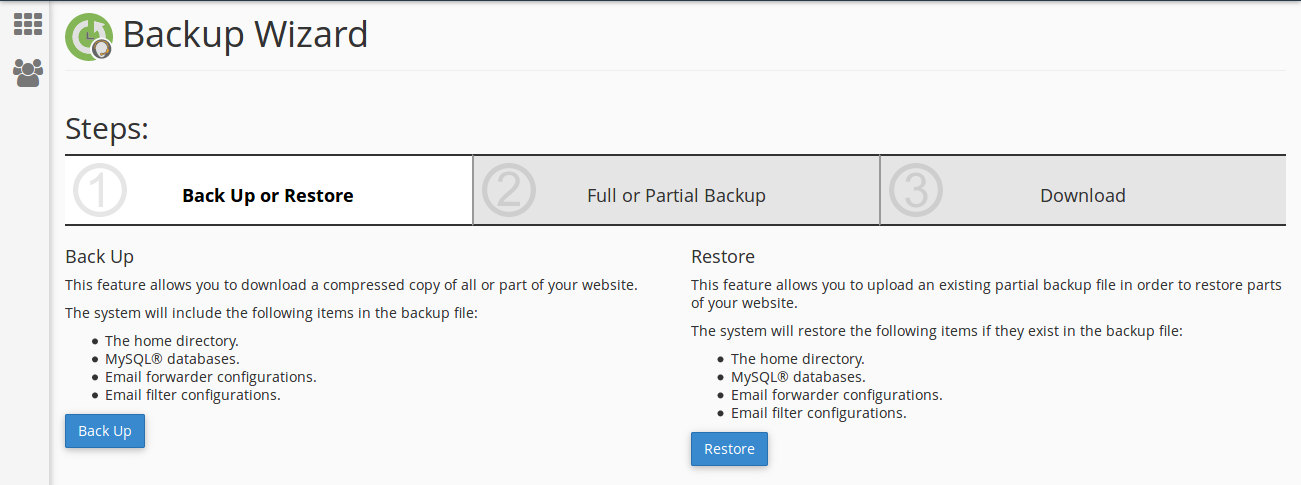
You can see 2 icons: Backup and Backup wizard. We will take a look at each below.
Backup option is general option with all types of backups presented.
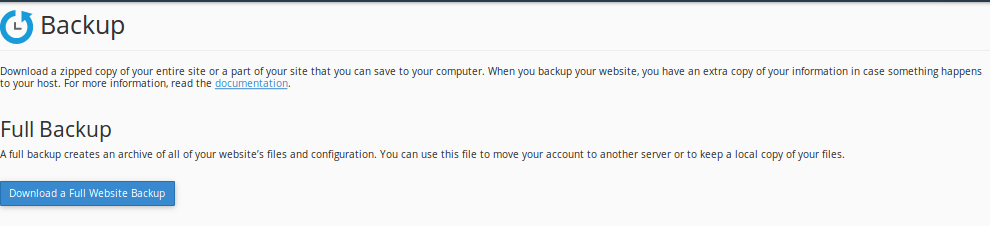
For most cases and purposes Full cPanel backup should be generated. If you choose that option, system will create a tar.gz archive file with ALL files of your website, including databases, email accounts and their content as well. Archive file will be placed in home folder of your website. You can locate it by using File manager or any FTP-client. How to upload files via FTP
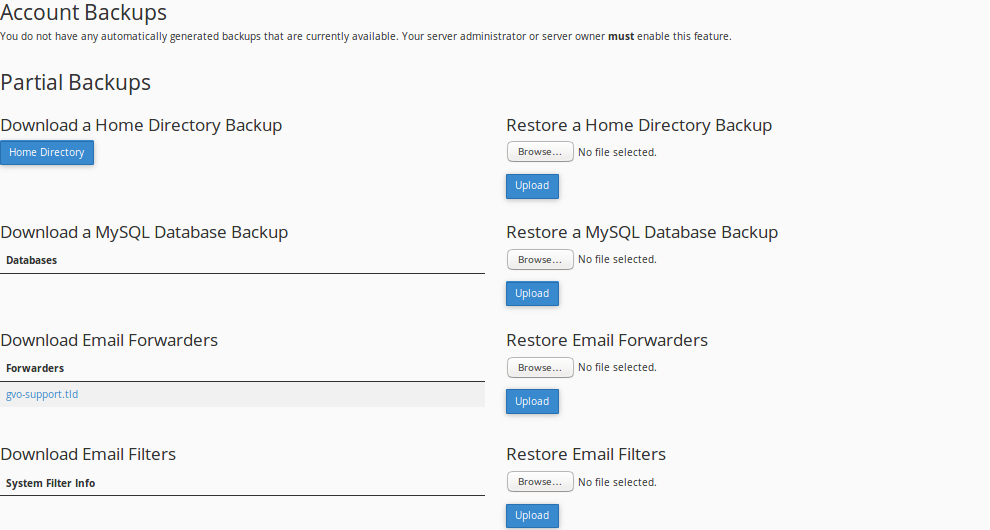
If you do not need a full cPanel backup, you can choose option to ‘Download a Home directory backup’ (that will archive only files of your website WITHOUT database) or ‘Download a MySQL Database backup’ (this option will archive ONLY databases, without files).
Options ‘Download email forwarders’ and ‘Download email filters’ are pretty straight-forward and allow you to make a copy of ONLY email forwarders and email filters respectively.
Backup wizard option will launch backup creation assistant, which will help you choosing what files you should backup in three easy steps. However, all options are identical to ones in Backup option.
That is it!
In this guide we will take a look at error 509 and how to fix it properly.
This is a generic error message that appears when the website where the message is shown has reached its traffic limit (data transfer) defined.
Here are the steps to get rid of that error:
- Log in to your WHM. How to do that you can check here How to log into WHM/cPanel
- Navigate to ‘Edit a package’ option under Packages tab. If you are not sure where it is, please
start typing ‘Edit a package’ in search field.
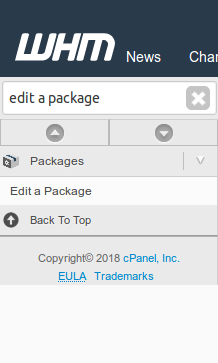
- Choose package you would like to edit and click ‘Edit button’
- You will be presented with options similar to ones in our guide “How to create a resource package”
- Make sure that Bandwith is at least 30 000. Increase it even further, if necessary.
- Click ‘Save changes’
That is it, you successfully increased bandwidth limit for your website. Reload page and error message will be gone.
In this guide we will know how to install a SSL-certificate on your domain.
First thing you need to do is to generate a CSR (Signing Request).
CSR is required before you can even attempt to purchase a SSL-certificate, your vendor will use CSR to generate certificate.
Let us take a look at CSR generation procedure:
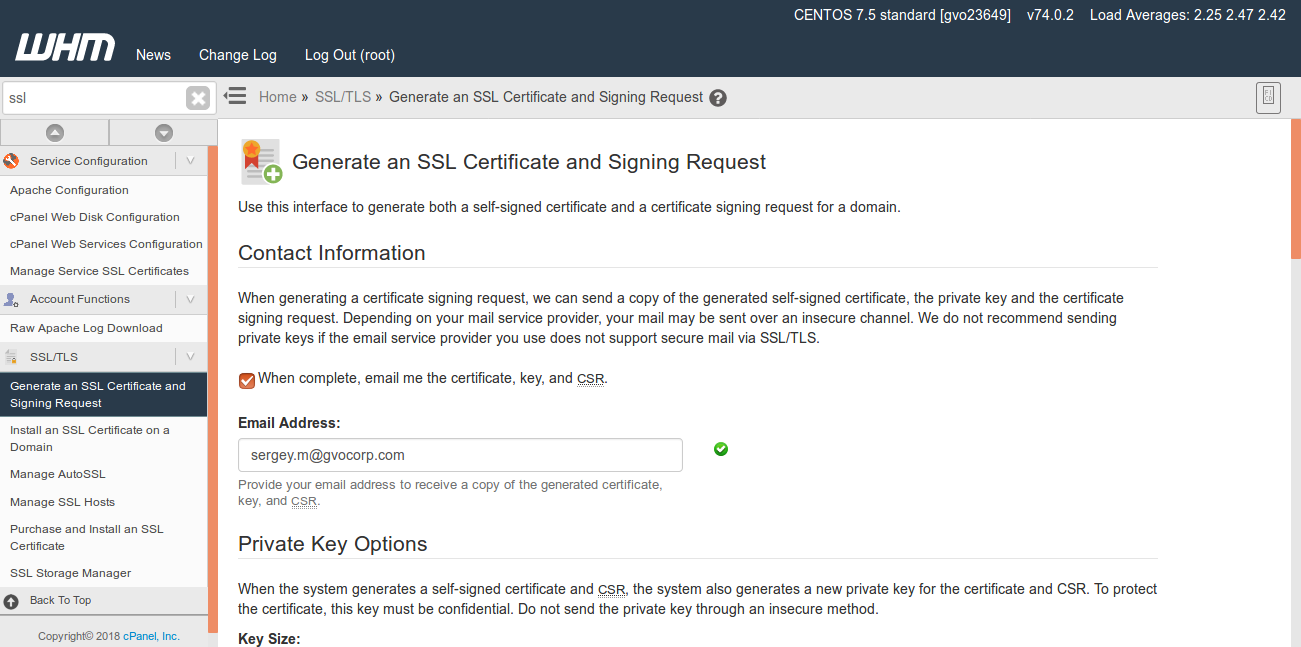
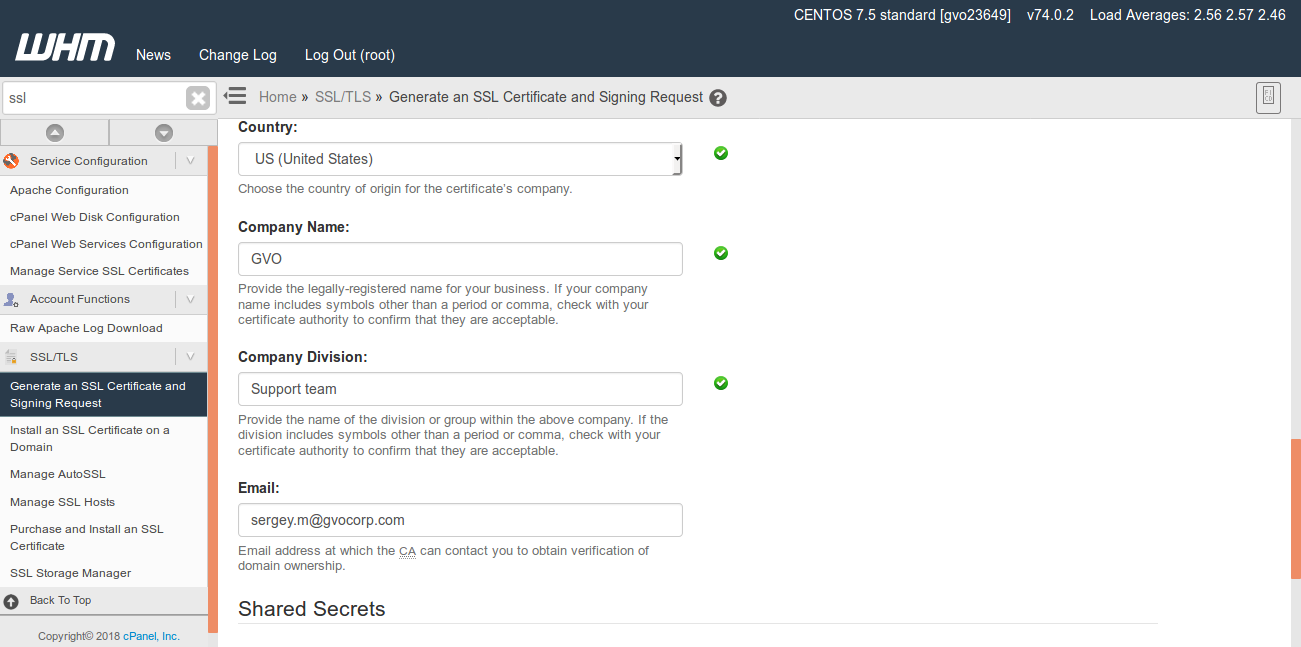
- Log in to your WHM
- Navigate to ‘Generate an SSL Certificate and Signing Request’ option in your WHM
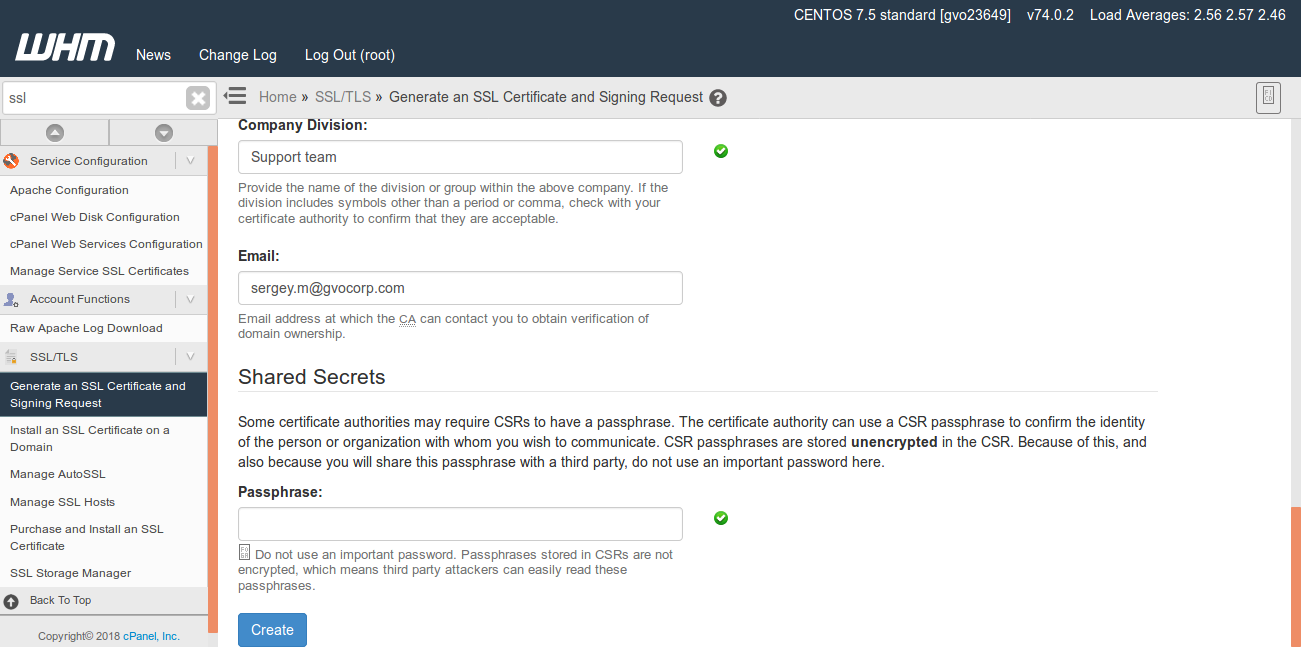
- You should be presented with several fields to fill-out:
Email Address: this should be valid email address, system will send CSR there, in .csr file
Private Key Options: there you can choose encryption key size, 4096 bit size is better. System will send it to email address that you have specified above in .key file.
Domains: please type your domain name here
City: specify your city
State: specify your state
Country: specify your country
Company Name: specify your company name
Company Division: this is optional
Email: this should be a valid email, your vendor may try to reach you to double-check that you are domain owner.
- Hit ‘Create’ button.
Please refer to the following screenshot:

System will generate CSR file and your private key file and send it to email, if you have specified one.
IMPORTANT: please save your private key file in safe place and do not show it to anyone. If it is leaked, your website will be vulnerable.
Here how CSR should look like:
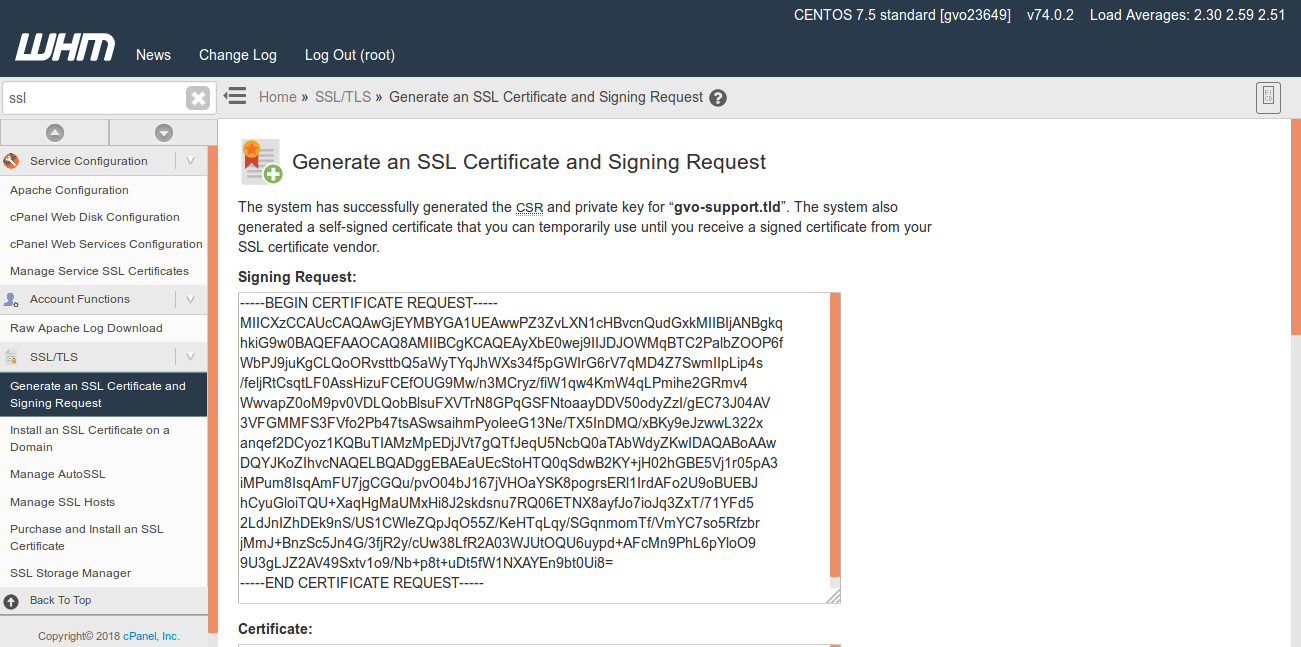
IMPORTANT: CSR starts with -----BEGIN CERTIFICATE REQUEST----- and ends with -----END CERTIFICATE REQUEST----- lines, if you need to copy CSR you have to copy that lines as well.
Now you have a CSR and can go to your SSL-certificate vendor to obtain a certificate. Once you get the certificate, please log in to your WHM again and navigate to ‘Install an SSL Certificate on a Domain’ option. There you should be able to install it.
IMPORTANT: if system will fill out information automatically, you should replace it with info that your vendor provided.
Process of SSL-certificate installation is as follows:
- Specify domain name in Domain field.
- Copy and paste the contents of the .crt file your vendor provided you.
- Copy and paste the contents of the .key file that you have generated during CSR generation.
- Copy and paste the contents of the .ca bundle, this would be provided when you purchase an SSL
- Hit ‘Install’
Please take a look as example here
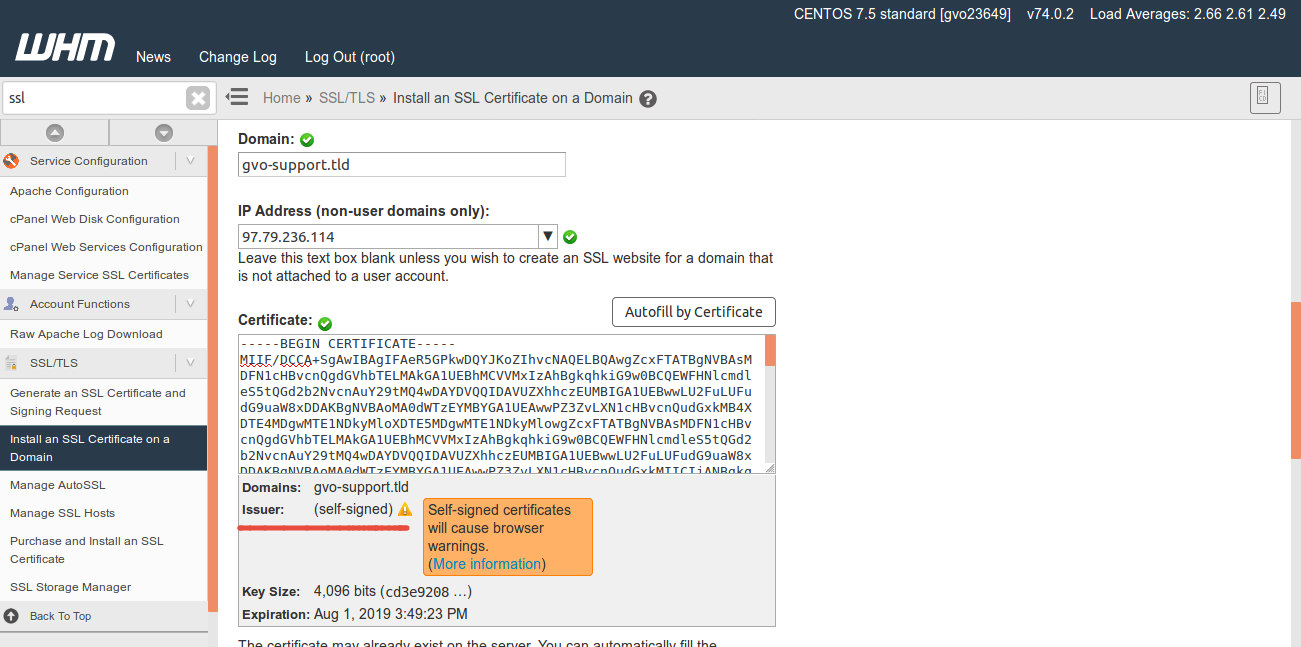
IMPORTANT: for the purposes of this tutorial we are using self-signed certificate, that is why you can see warning message on the screenshot. If you obtain certificate from third-party vendor, there will not be any warning messages.
That is all that you need to do to install SSL-certificate on your domain.